
Follow the steps below to get started.
STEP 1. Login to Google Analytics OR create a new account
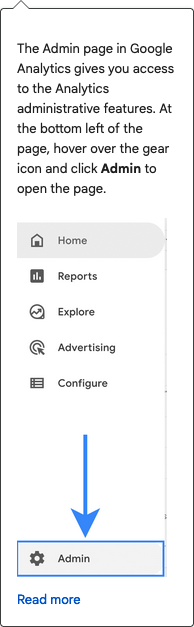
Go to https://analytics.google.com/ and login OR create a new account following these steps:
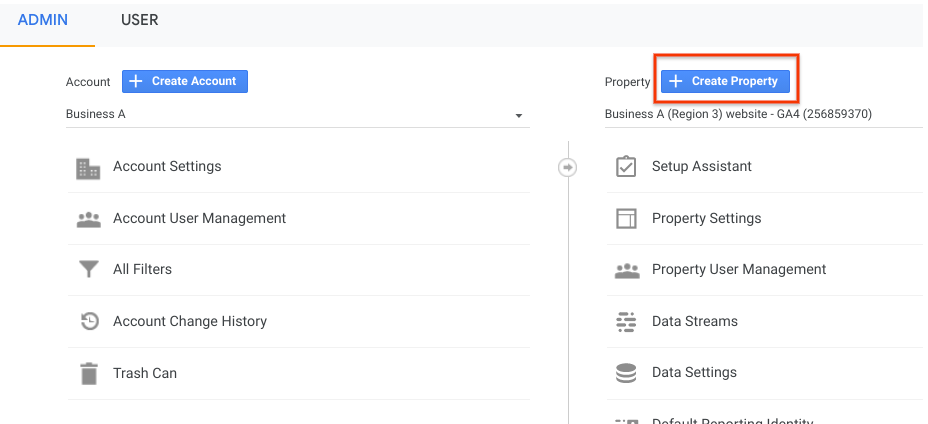
- In Admin, in the Account column, click Create Account.
- Provide an account name. Configure the data-sharing settings to control which data you share with Google.
- Click Next to add the first property to the account.
STEP 2. Create a new Google Analytics 4 property
NOTE: You need the Editor role to add properties to a Google Analytics account. If you created this account, you automatically have the Editor role.
TO CREATE A PROPERTY:
1. Are you continuing from “Create an Analytics account”, above? If so, skip to step 2 below. Otherwise,
- In Admin, look at the Account column to make sure that you’ve selected the right account. Then, in the Property column, click Create Property.
2. Enter a name for the property (e.g. “My Business, Inc website”) and select the reporting time zone and currency. If a visitor comes to your website on a Tuesday in their time zone, but it’s Monday in your time zone, the visit is recorded as having occurred on Monday.
- If you choose a time zone that honors Daylight Savings Time, Analytics automatically adjusts for time changes. Use Greenwich Mean Time if you don’t want to adjust for Daylight Savings Time.
- Changing the time zone only affects data going forward. If you change the time zone for an existing property, you may see a flat spot or a spike in your data, caused by the time shift forwards or backwards, respectively. Report data may refer to the old time zone for a short period after you update your settings, until Analytics servers have processed the change.
- We recommend that you change the time zone for a property no more than once per day so Analytics can process the change.
3. Click Next. Select your industry category and business size.
4. Click Create and accept the Analytics Terms of Service and the Data Processing Amendment.
STEP 3: Add a data stream
1. Are you continuing from “Create a property”, above? If so, skip to step 2. “Click Web”. Otherwise,
- In Admin, look at the Account column to make sure that you have your desired account selected. Then, look at the Property column to make sure that you have your desired property selected.
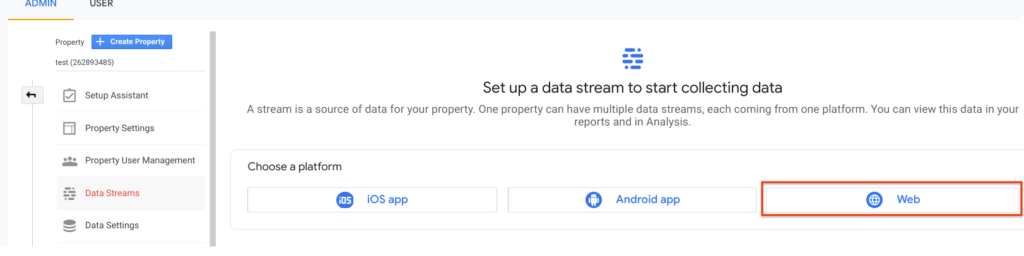
- In the Property column, click Data Streams > Add stream.
2. Click Web.
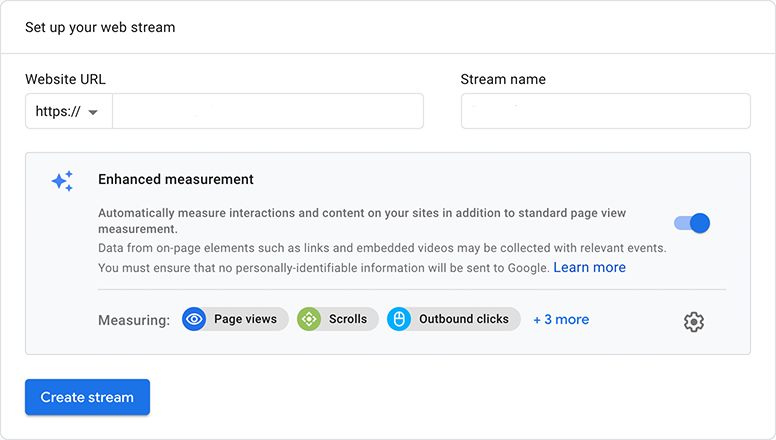
3. Enter the URL of your primary website, e.g., “example.com”, and a Stream name, e.g. “Example, Inc. (web stream)”.
4. You have the option to enable or disable enhanced measurement. Enhanced measurement automatically collects page views and other events. Once the data stream has been created, you can always go back and individually disable the enhanced measurement events you don’t want to collect. So, we recommend that you enable enhanced measurement now.
5. Click Create stream.
STEP 4: Connect Google Analytics to your website
You’ll need to add the Google tag to your website to begin seeing data in your new Google Analytics 4 property.
You need access to the HTML for your web pages. Follow the steps below to find your Google tag, then copy it and send it to your web developer to add it to your website if you’re unable to do it yourself. Contact us if you need help with this.
- Sign in to your Google Analytics account.
- Click Admin.
- At the top of the Property column, select your property.
- In the Property column, click Data streams > Web.
- Click the data stream for your website.
- Under Google tag, click View tag instructions.
- On the Installation instructions page, select Install manually:
- On the screen, you’ll see the JavaScript snippet for your account’s Google tag. Your Google tag is the entire section of code that appears, beginning with:
<!-- Google tag (gtag.js) -->
and ending with</script>
- On the screen, you’ll see the JavaScript snippet for your account’s Google tag. Your Google tag is the entire section of code that appears, beginning with:

STEP 5: Copy your Google tag (see STEP 4) and send it to your web developer
Contact us if you need help with this.
Data collection may take up to 30 minutes to begin. You can then use the Realtime report to verify that you’re receiving data.